
Rumors of a Final Fantasy VII Remake first began circulating in 2005 after Square Enix remade the game’s intro sequence to showcase the power of the PS3. It would not be for another 10 years though that these rumors eventually became a reality. It was announced on the Sony stage at E3 in 2015 and released earlier this year to critical acclaim. It currently holds an 87 rating on Metacritic and has sold more than 5 million copies.
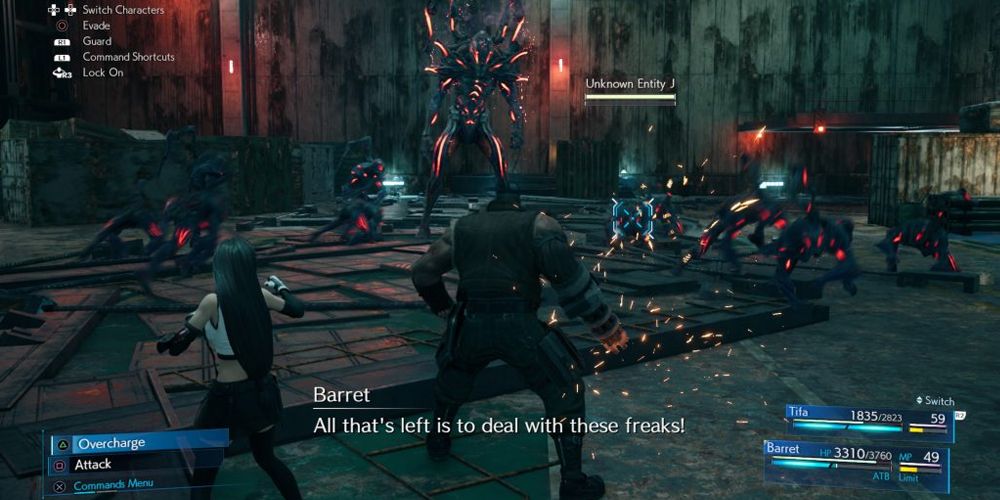
Despite only covering the Midgar section from the original game, the remake is packed full of additional content. It features new locations, new side quests and a number of additional boss fights for players to sink their teeth into. There are 25 of them spread across the game’s 18 chapters, each presenting its own unique set of challenges. Some of them are relatively easy, but others can be incredibly difficult for those who are yet to master the game’s combat and Materia systems.
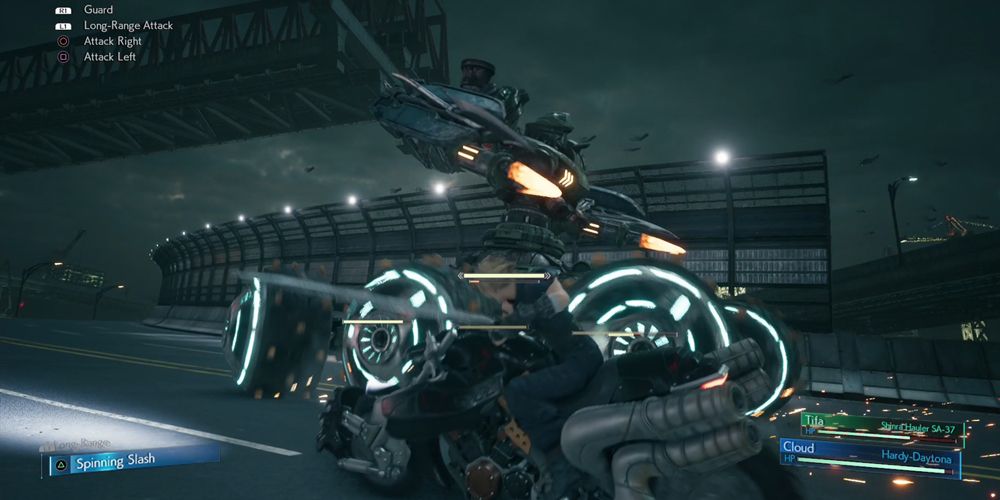
25 Roche (Motorcycle Battle): Chapter 4
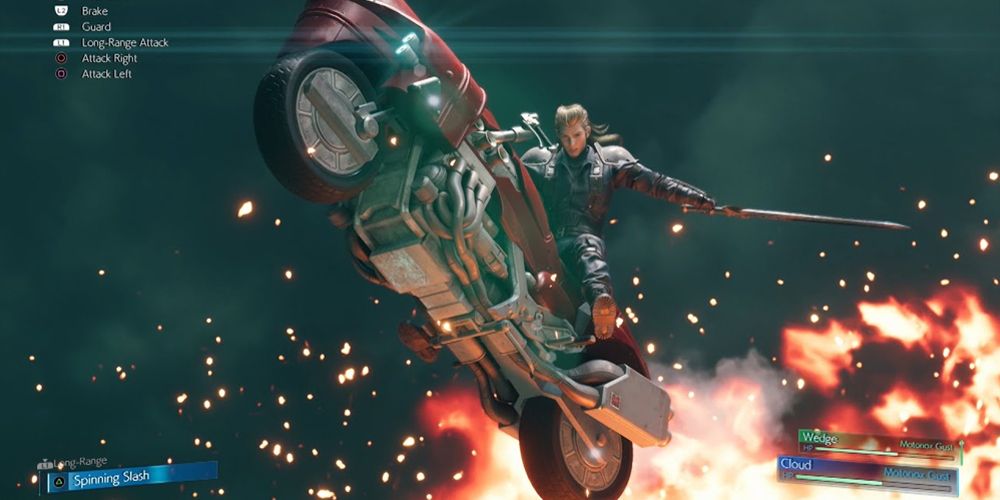
This battle is more annoying than it is difficult. Providing players are able to dodge his attacks, Roche really shouldn’t cause too much trouble. Using the ranged special attack (L1 +Triangle) can help to chip away at his health bar a little faster, but otherwise it’s just a case of waiting for the right moments to attack and not being too greedy.
24 Enigmatic Spectre: Chapter 4
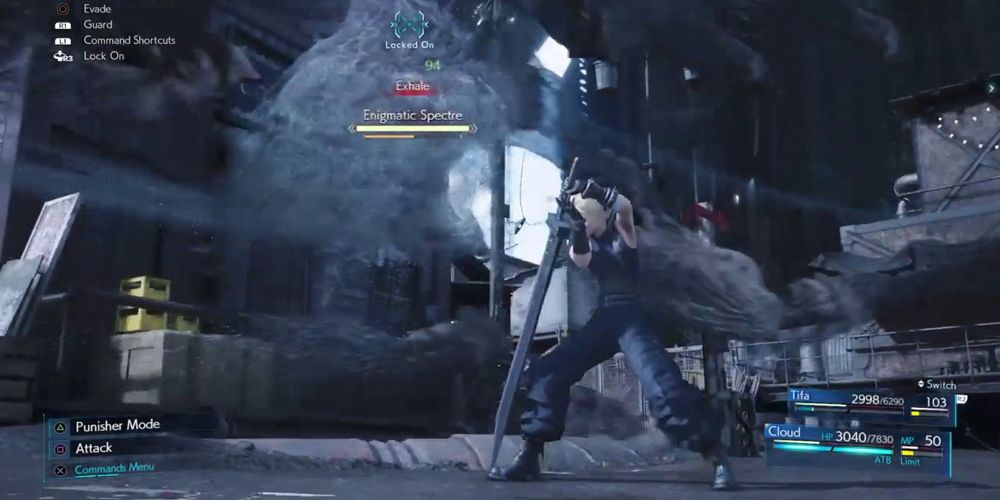
There’s a lot happening on screen during this battle which can make it easy to lose focus. It’s not a particularly challenging fight though and there are two equally viable strategies for beating it. The first involves ignoring the gray specters entirely and focusing only on the Enigmatic Spectre. Alternatively, defeating the gray specters first will pressure the Enigmatic Spectre which will in turn make staggering it far easier.
23 Brain Pod: Chapter 17
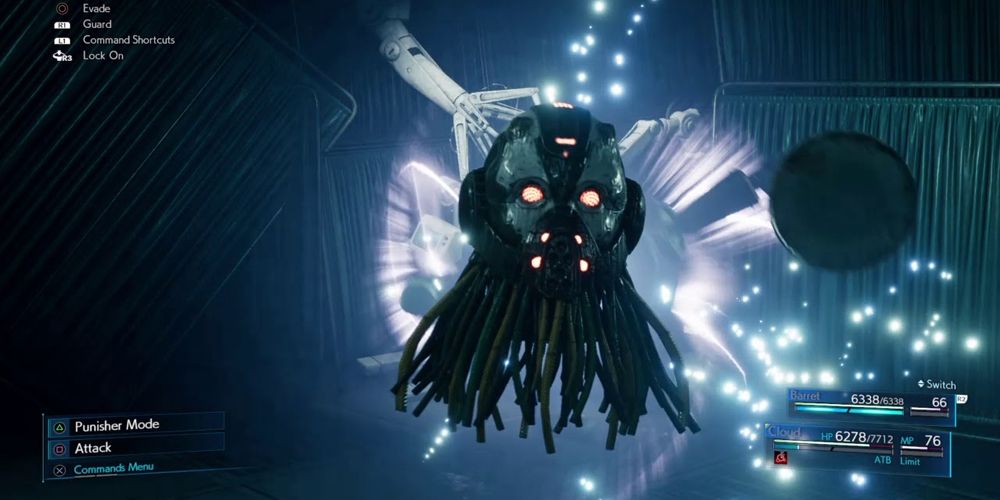
Be sure to equip Cloud’s weapon with a Lightning and Elemental Materia combo and then just go to town. If needed, have Barret attack from distance, although the first part of this battle is so easy that Cloud should be able to handle it all by himself. About half way through, the Brain Pod will split into copies at which point it’s best to have Barret cast Thunder on them all or use Cloud’s Triple Slash attack to take them out quickly. They can afflict poison damage, so equipping Star Pendants could be useful, but the battle really shouldn’t last long enough for poison to ever be an issue.
22 Roche: Chapter 4
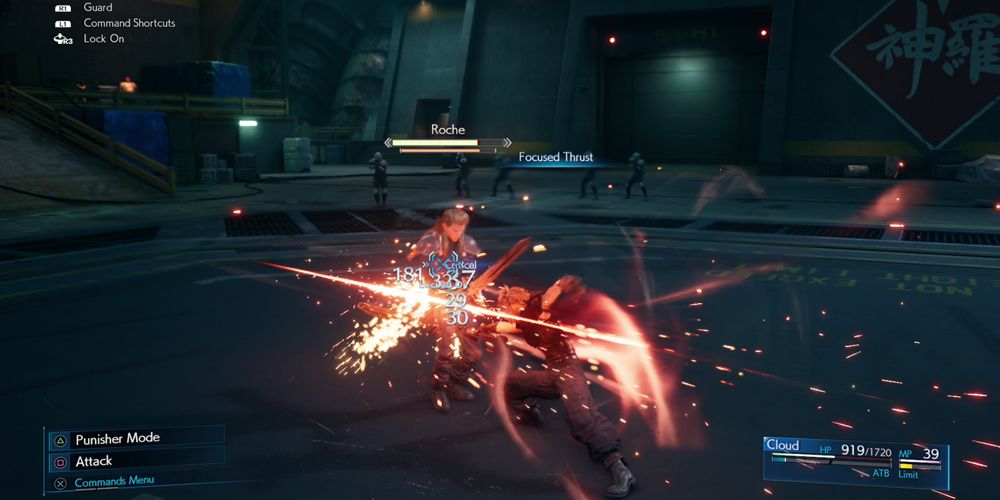
The second encounter with Roche is considerably more difficult than the first. He is weak to fire though, which is handy given that by this point players should have both the Ifrit and Fire Materia. Finding a moment to cast the latter may prove difficult however. The Punisher stance can make this battle considerably easier as holding R1 will both block and counter several of his main physical attacks.
21 Scorpion Sentinel: Chapter 1
Much of the Scorpion Sentinel’s difficulty comes from the player’s inexperience with the combat system. It’s the first boss in the game and many players will still be getting to grips with the battle mechanics when it arrives. It’s actually a fairly straightforward fight though thanks to its weakness to Lightning magic and the various piles of debris that can be used for cover.
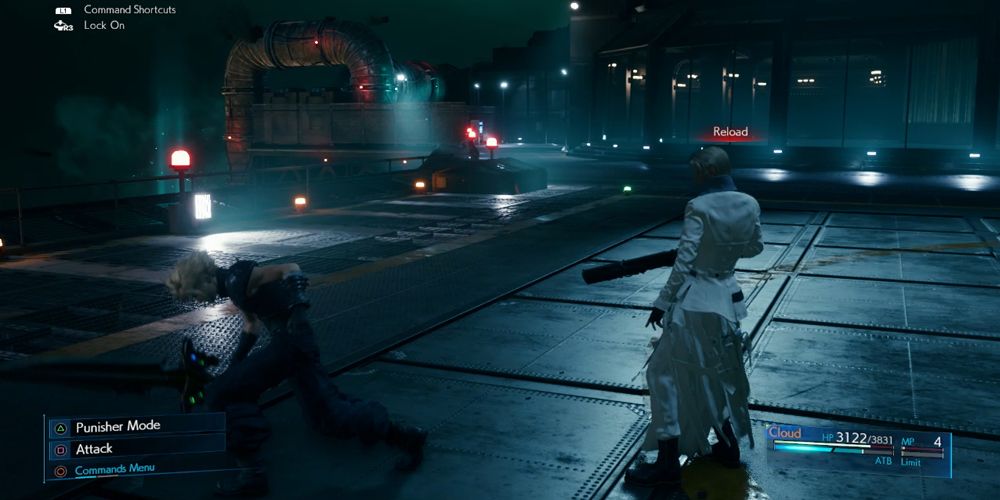
20 Reno: Chapter 8
Reno can actually be quite a difficult battle for those who haven’t figured out how to effectively use Cloud’s stances yet. For those who have though, the Punisher stance makes this battle a bit of a formality. As with the earlier duel with Roche, blocking and countering until he’s staggered is the name of the game. This can then be followed up with Triple Slash or Focus Thrust. Players just need to keep an eye out for his EM mines as these can cause stun damage and leave Cloud open to some big damage.
19 Crab Warden: Chapter 5
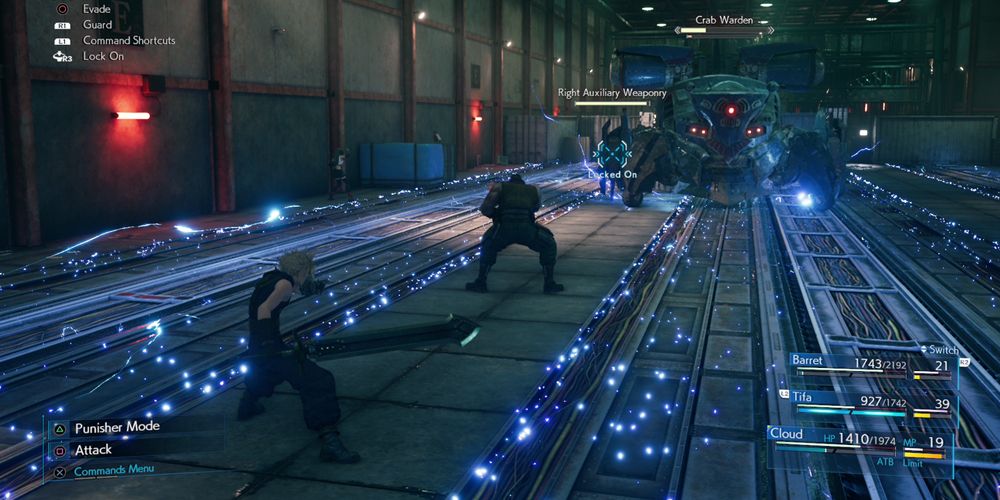
The Crab Warden can be fairly challenging depending on Materia, but, providing somebody has Lightning Materia equipped, it shouldn’t be too bad. The best strategy is to focus on its legs first, which will greatly increase the stagger bar. After a few of the legs have been destroyed, its generator will be exposed which will allow players to decimate it with some quick Thunder casts.
18 Abzu: Chapter 10
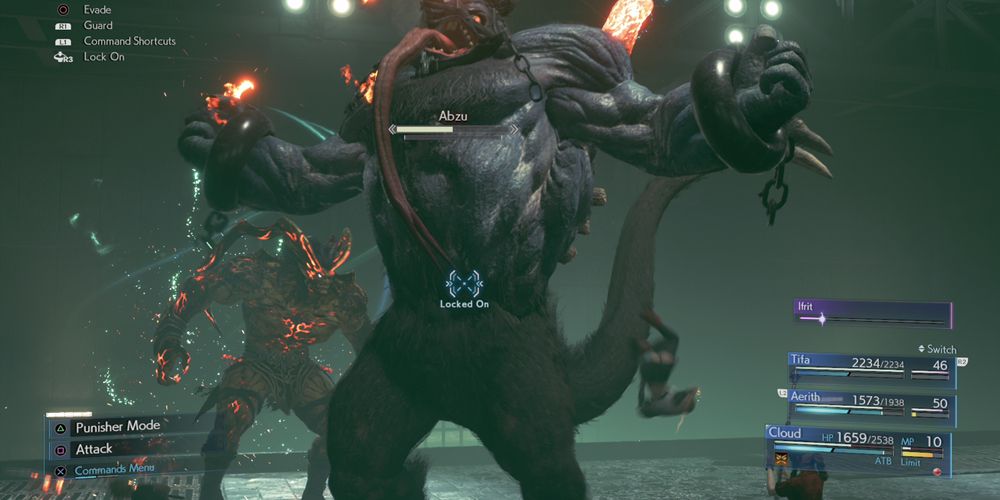
Compared to the previous fight, Abzu is a walk in the park. Just make sure everybody has Fire Materia equipped and pair one with the Elemental Materia in Cloud or Tifa’s weapon. Hit him hard with the aforementioned party members and have Aerith cast fire on his horn whenever possible to deal some big damage. Just be sure to dodge his water attacks and this fight will be relatively straightforward. Even on hard mode, there’s not much to it.
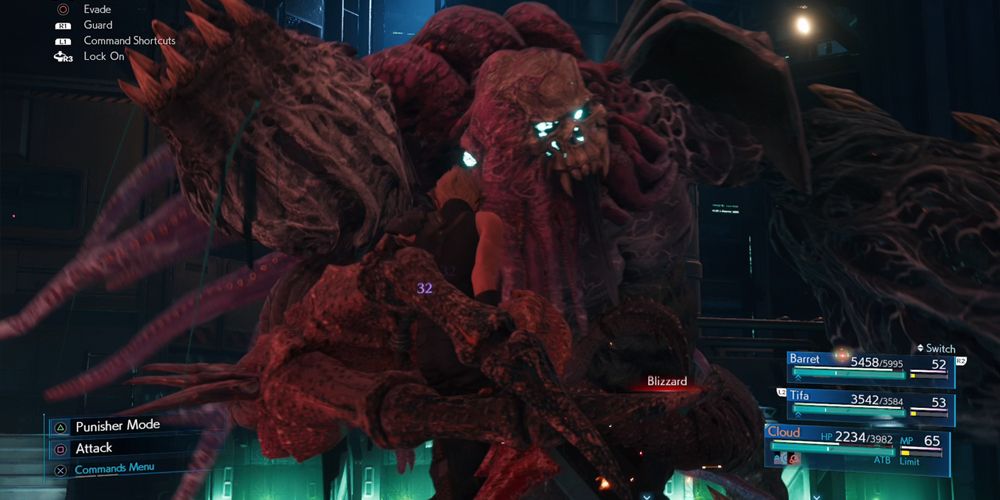
17 Failed Experiment: Chapter 13
The size of this boss can make it seem a lot more intimidating than it actually is. With the right setup, it’s really not too bad thanks to its weakness to Ice attacks. With this in mind, equipping an Ice/Elemental combo in Barret or Tifa’s weapon slots will improve damage while a few casts of Blizzard here and there can really help to increase the stagger bar.
Players should have Barret firing off abilities from distance and use Tifa’s to increase the stagger bar whenever possible. Target the appendages first and then unleash everything on its heart when it’s exposed and it should go down pretty quickly.
16 Motor Ball: Chapter 18
While Motor Ball provides a lot more challenge than the earlier motorcycle battle, it is no less annoying. Players will need to dodge the fireballs and then get in close to take out each of its wheels on both sides. After it’s staggered, deal as much damage as possible and then rinse and repeat until the battle’s over. As with the Roche motorcycle battle, this one can be skipped when playing through the game on hard mode.
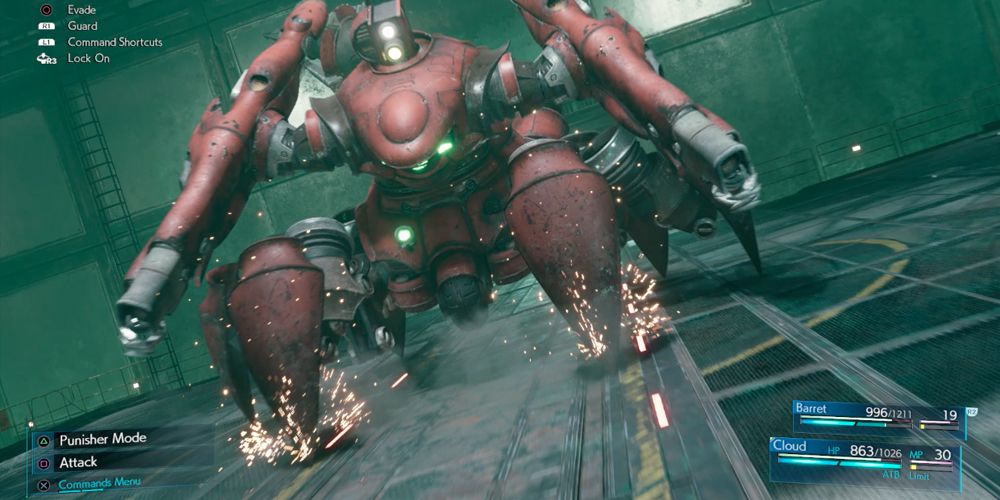
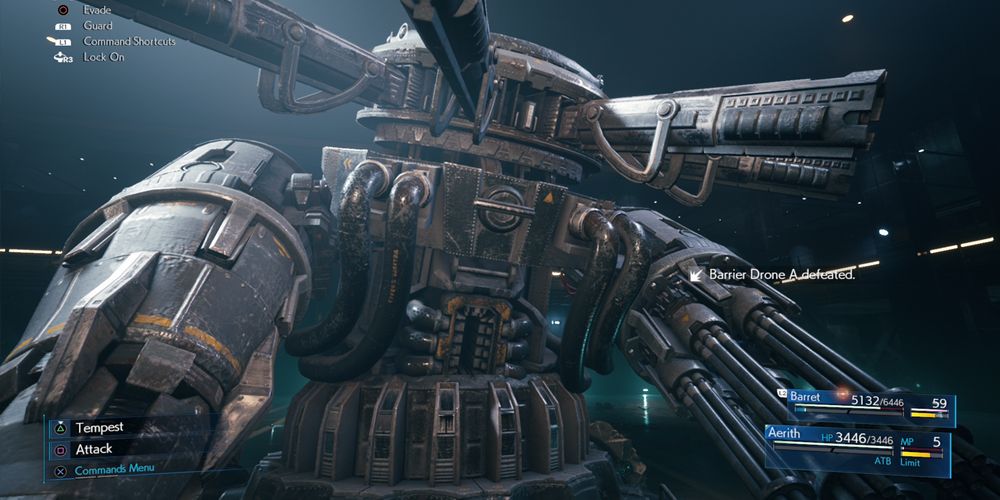
15 Airbuster: Chapter 7

The game does a great job of building up the Airbuster battle, but, when it finally arrives, it falls a little flat. Just like the original game, the boss attacks the party side on, which will temporarily separate Cloud from the rest of the party. The recently acquired Elemental Materia can make this fight a lot easier and should be equipped on Barret or Tifa’s weapon together with a Lightning Materia. Prior to the battle, it’s also possible to weaken the enemy by removing its AI Cores and Big Bomber Shells using the computer terminals and key cards.
14 Reno & Rude: Chapter 12
Surprisingly, the battle with Reno and Rude really isn’t too difficult. Players should equip a Lightning / Elemental combo in Cloud or Barret’s armor slots to absorb Reno’s damage. When Rude eventually joins the battle, it’s best to take him out as quickly as possible and then return to Reno if he hasn’t already gone down. Both of them are vulnerable to poison, which can help to speed things up a little.
13 Specimen H0512: Chapter 16
Considering its placement in the game, this battle is incredibly easy. It’s weak to Lightning, so use an elemental combination in Cloud and Barret’s weapons and target the left claw first. Be sure to take out the minions as quickly as possible and try to attack from distance using Barret to avoid some of its hard-hitting attacks.
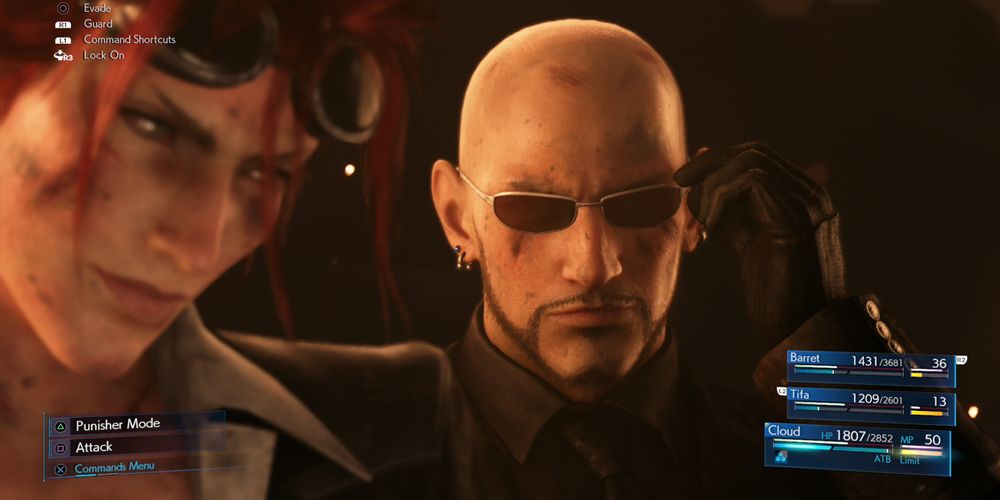
12 Rude: Chapter 8
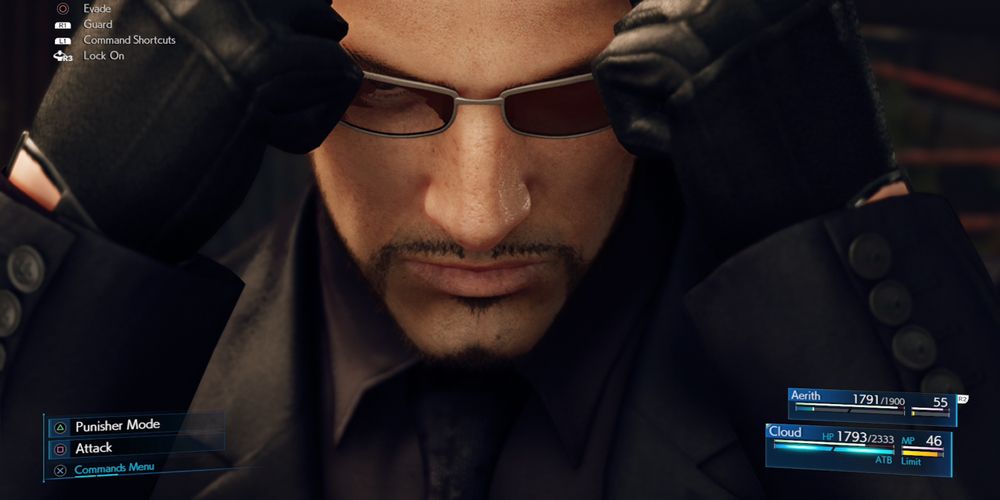
The battle with Rude is a lot tougher than some of the previous duels meaning that the old block and counter-strategy just isn’t going to cut it anymore. Although a few of his moves can still be countered, players may be better off just dodging his attacks using the circle button and then getting in a few quick strikes while he readjusts. Rude is so preoccupied with Cloud that Aerith effectively has free rein, so players should use this to their advantage. Have her casting Aero as often as possible and be sure to equip Cloud’s weapon with a Wind/Elemental pairing.
11 Darkstar & Rufus: Chapter 17
The game is incredibly cryptic when it comes to its advice for tackling Rufus, but, with a little trial and error (or some logical reasoning), it’s fairly simple to figure out that Braver is the best move to use in this battle. It will instantly stagger Rufus, allowing players to deal some decent damage. When it comes to strategy, taking Darkstar out first is something of a necessity. After that, players should build up ATB and hit Rufus with Braver while he’s reloading. Without Braver, this fight would be incredibly tough. For those who know to use it though, it’s not too bad at all.
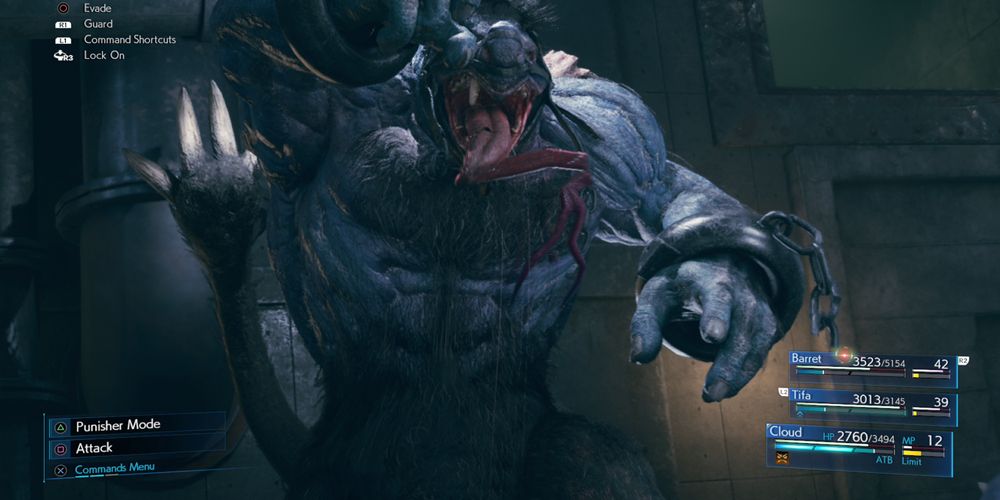
10 Ghoul: Chapter 11
The key to this battle is taking note of which form the Ghoul is in. When in his ghostly form, players should focus on hitting him with Fire spells. When it changes to its physical form, have Cloud and Tifa get in close to deal some big damage using a Fire and Elemental Materia combo in one of their weapons. It can be a fairly tough battle, due both to the constantly changing form and the numerous obstacles that litter the battle area.
9 Swordipede: Chapter 17
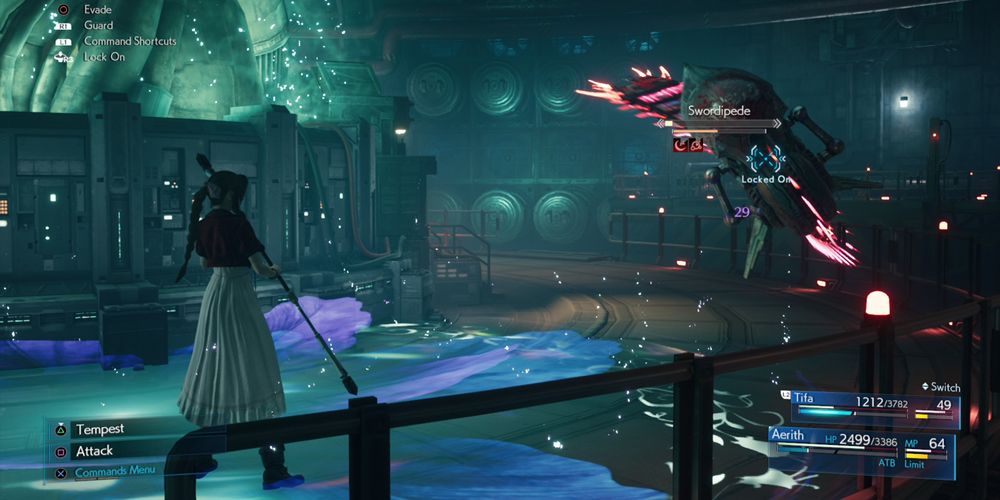
The Swordipede battle is one of the more unique ones found in the game due to the way that it jumps between parties. Players should be sure to pair Elemental and Lightning Materia in Aerith and Tifa’s armors though as they’ll be the ones doing most of the fighting. Attack from distance using either Barret or Aerith and be sure to focus any close range attacks on the Swordipede’s head. Providing players avoid making contact with its spikes, it should prove to be a fairly simple battle.
8 Abzu & Shoats: Chapter 14
While the Shoats might not seem too problematic at first, they can be incredibly annoying during this battle. While ignoring them isn’t really an option, trying to defeat them can lead to players becoming distracted and getting hit by some of Abzu’s big attacks. With this in mind, it’s better to instead dodge the shoats and let off the odd triple-slash from time to time to keep their numbers manageable. Abzu remains weak to Fire, so pair a Fire Materia with an Elemental Materia in Cloud’s weapon and be sure to dodge whenever he uses one of his big water attacks. It’s a tough battle, but more as a result of the Shoats than anything else.
7 Valkyrie: Chapter 15
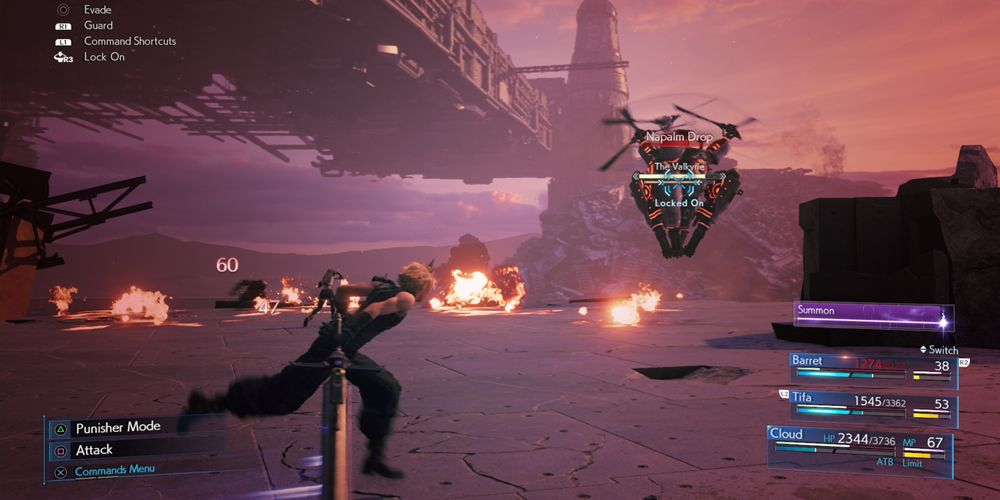
The Valkyrie boss is a tough battle due to its length and multiple phases. Barret should have a Wind / Elemental Materia combo in his weapon while Cloud should instead use Lightning / Elemental. If resources allow, Tifa should also be equipped with one of each element.
While the Valkyrie is in the air, players should hit it with Wind attacks. Once it lands, have Cloud move in to deal some big damage with Triple Slash. In the second stage of the battle, take out the drone as quickly as possible and then dish out some damage straight after dodging its Drill Dive attack. When it enters its final phase, players need to lure it into the blue laser to take out its shield and then move in for the kill when it’s staggered.
6 Whisper Harbinger: Chapter 18

This is another one of those battles that’s difficult because of how long it drags on for rather than the actual combat itself. There are multiple phases, with each one requiring a slightly different strategy. Ultimately though, it can be boiled down to dodging and attacking. While the Whispers are in their individual forms it’s better to try to take them out one by one when possible. After fighting and defeating each one a second time, the Whisper Harbinger will be staggered and players should aim to deal as much damage as possible through the smaller Whispers. Eventually, the Whispers will combine to form the surprisingly easy Whisper Bahamut and will then need to be defeated individually one last time.
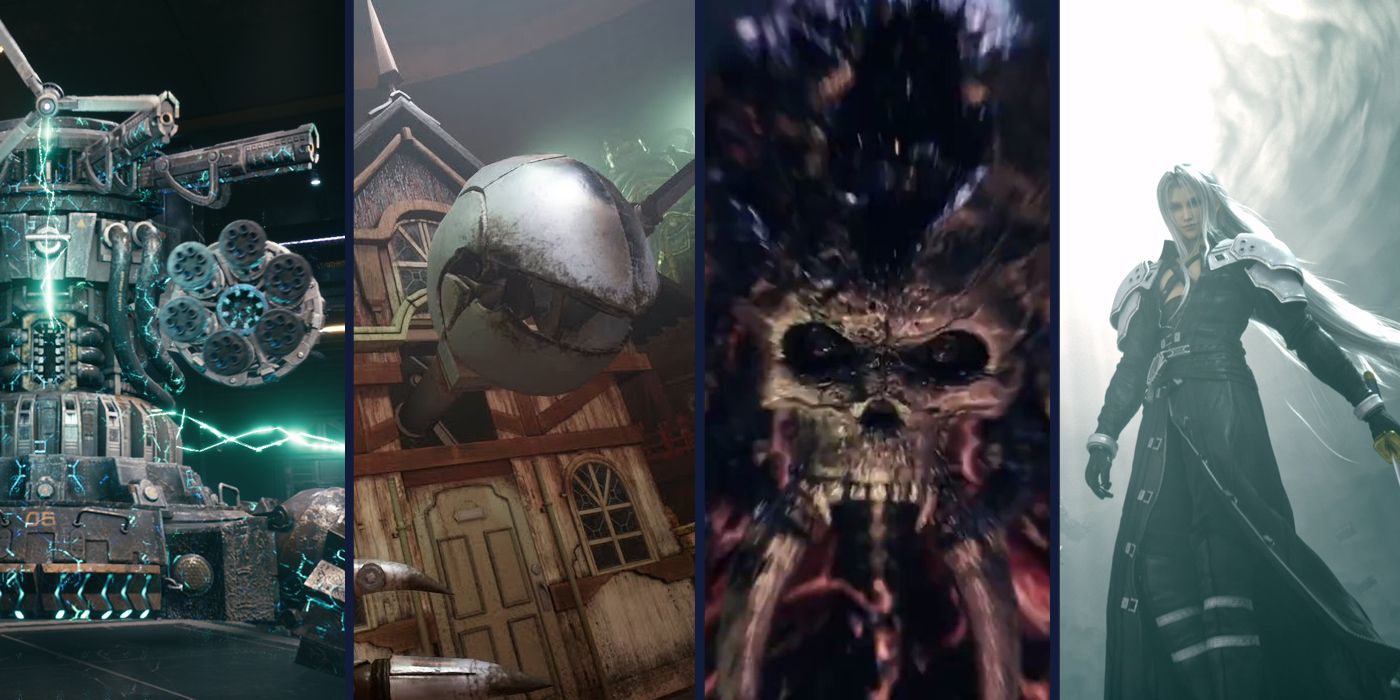
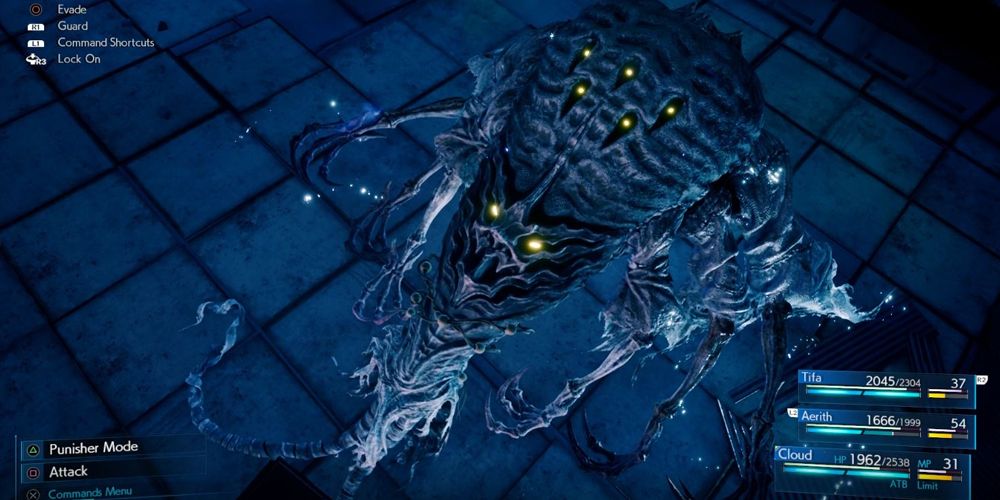
5 Jenova Dreamweaver: Chapter 17

Jenova’s not the toughest boss in the game, but she is one of the most frustrating. She’ll counter most physical attacks with a tentacle whip and will regularly summon groups of tentacles that must be defeated before any more damage can be inflicted. Hang back and attack with Aerith from afar to avoid counter attacks and then switch to Cloud to quickly take out the tentacles with Triple Slash. It can be a little tedious, but she doesn’t have too many big attacks and so outlasting her shouldn’t be too challenging.
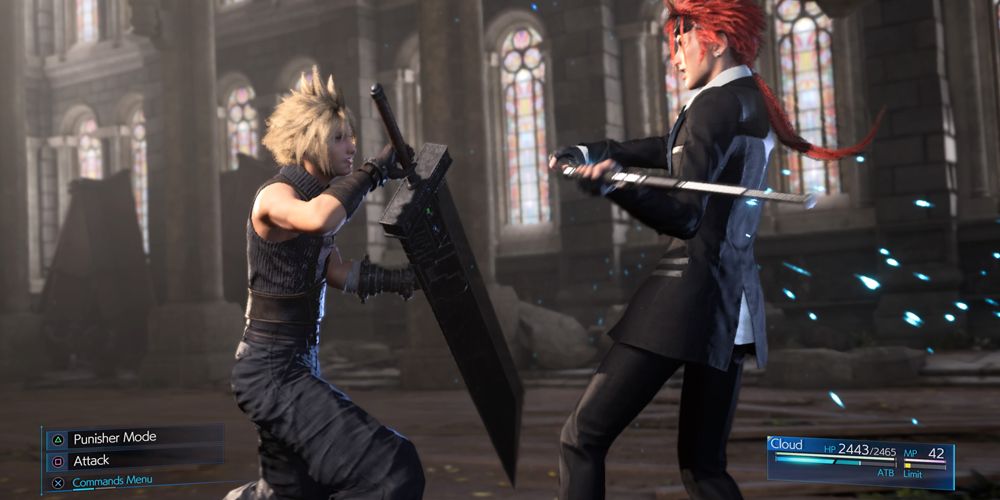
4 Sephiroth: Chapter 18
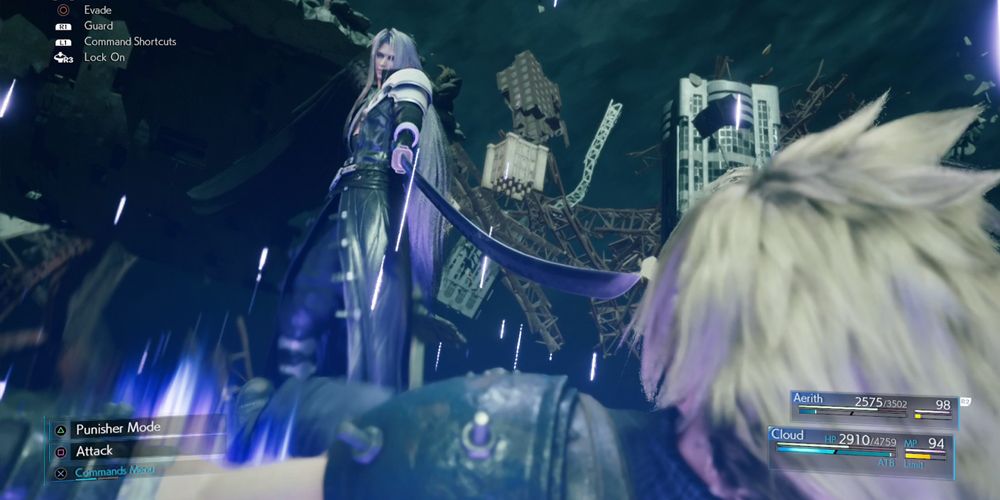
For all the complaints about Sephiroth’s prevalence throughout the game, he does make for a great final boss battle. It’s worth combining an Ice Materia with an Elemental Materia in Cloud’s armor for damage reduction and a Fire/Elemental combination can also be useful. During the first phase, players can simply use the Punisher stance and counter until another party member joins the fight. From here they should use Counterstance whenever Sephiroth prepares to use Telluric Fury and refrain from attacking if he uses Scintilla. It’s then just a case of dodging and chipping away at his health until he begins to count down from ten. At this point, it’s essential to finish him off before he reaches zero. It’s a tough battle, but also a very enjoyable one.
3 Eligor: Chapter 11
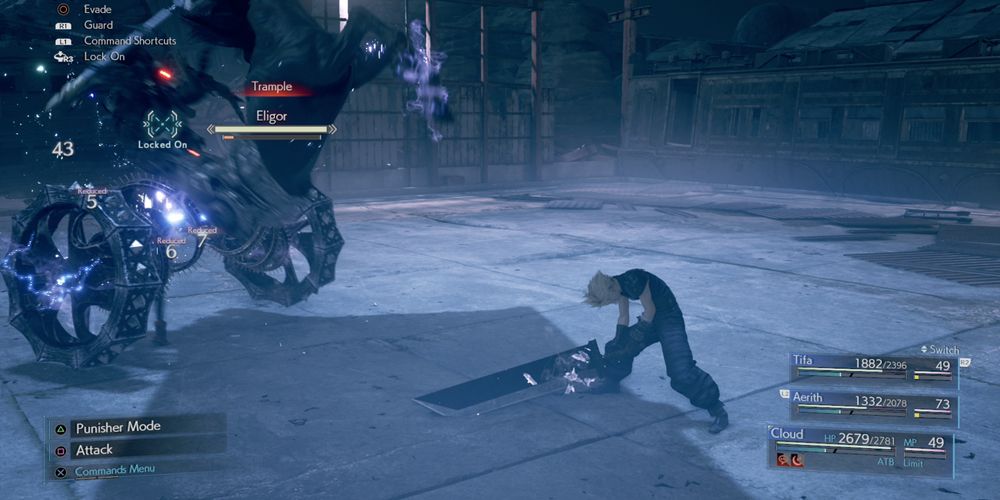
Players should equip an Ice/Elemental Materia combo in either Cloud or Tifa’s weapon before going into the battle. It’s also a good idea to equip Aerith with both Materia as well. While on the ground, Eligor isn’t too tricky, but every now and again he’ll fly up into the air. The intended strategy here is to hit him with Wind attacks to bring him back down, but, due to the poor accuracy of said attacks, this is sometimes easier said than done.
2 Hell House: Chapter 9
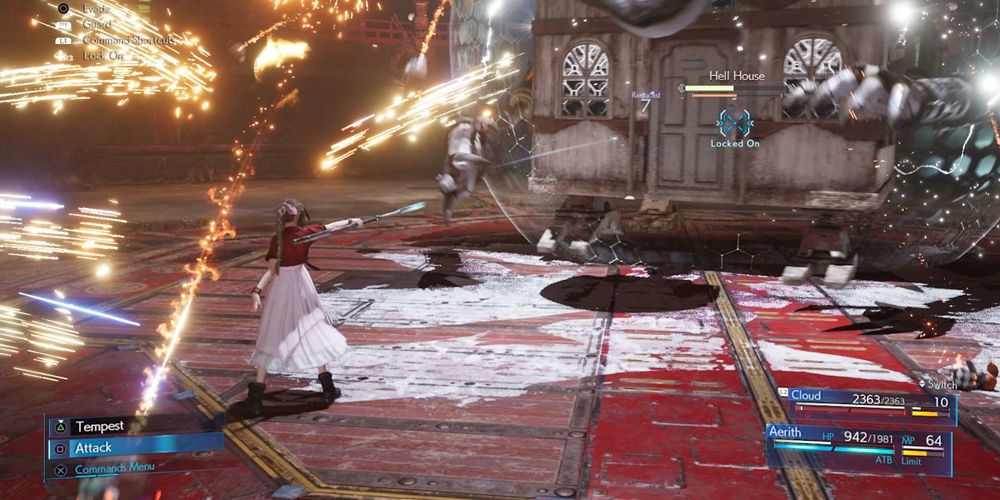
What was once a random mob is now an incredibly difficult coliseum battle that will likely take a few attempts to defeat. Players should have a good stock of Phoenix downs on hand before going into the battle or, if playing on hard mode, should equip both party members with Revive Materia. The best way to defeat the Hell House is to exploit its ever-changing weakness, which means equipping Aerith with all four elemental Materia and hitting it with the opposite color to its window lights whenever they’re lit up. If tackling this one on hard mode, taking out the Tonberries as soon as they arrive is an absolute must, as is making the most of Aerith’s double-cast ward.
1 The Arsenal: Chapter 17
When it comes to difficult battles, they don’t get much tougher than this one. There are numerous stages and plenty of big attacks that need to be dodged. Players should use Aerith primarily as a healer and have Barret dishing out as much damage as possible from afar. Whenever it starts charging Laser Cannon, hit it with everything to cancel the attack. Players will then need to continue dodging and chipping away at its health bar until a cutscene plays out. As soon as they regain control, they should hide behind the pile of debris and then hit The Arsenal with everything they have before it fires off another blast. With any luck, it should go down before it gets the chance. If not, it’s game over unless party members have a pair of Revival Earrings equipped.
Find A Teacher Form:
https://docs.google.com/forms/d/1vREBnX5n262umf4wU5U2pyTwvk9O-JrAgblA-wH9GFQ/viewform?edit_requested=true#responses
Email:
public1989two@gmail.com
www.itsec.hk
www.itsec.vip
www.itseceu.uk
Leave a Reply