
Keeping your Google account locked up tight is a useful skill, whether you know how to enable two-factor authentication on your Google account or you change your password regularly. Relying on Google’s suite of accounts for every facet of your life can mean total devastation if anything were to happen to them. That’s why it’s so important to keep a secure Google account, especially if you’re using equipment like best Google Assistant speakers or similar tech. Taking the proper security precautions against account theft or other breaches can protect you from ne’er-do-wells or even Google foul-ups, saving you headaches and plenty of precious time later.
Make a new, strong password
The easiest thing you can do right away to ensure you have a secure Google account is secure is to create a strong, unique password.
This step automatically eliminates security problems raised where you’ve used the same password twice or you’ve inadvertently given out a password in the past.
-
Make sure you’re signed into the Google account with the password you want to change and go to the Google Account Security page.
-
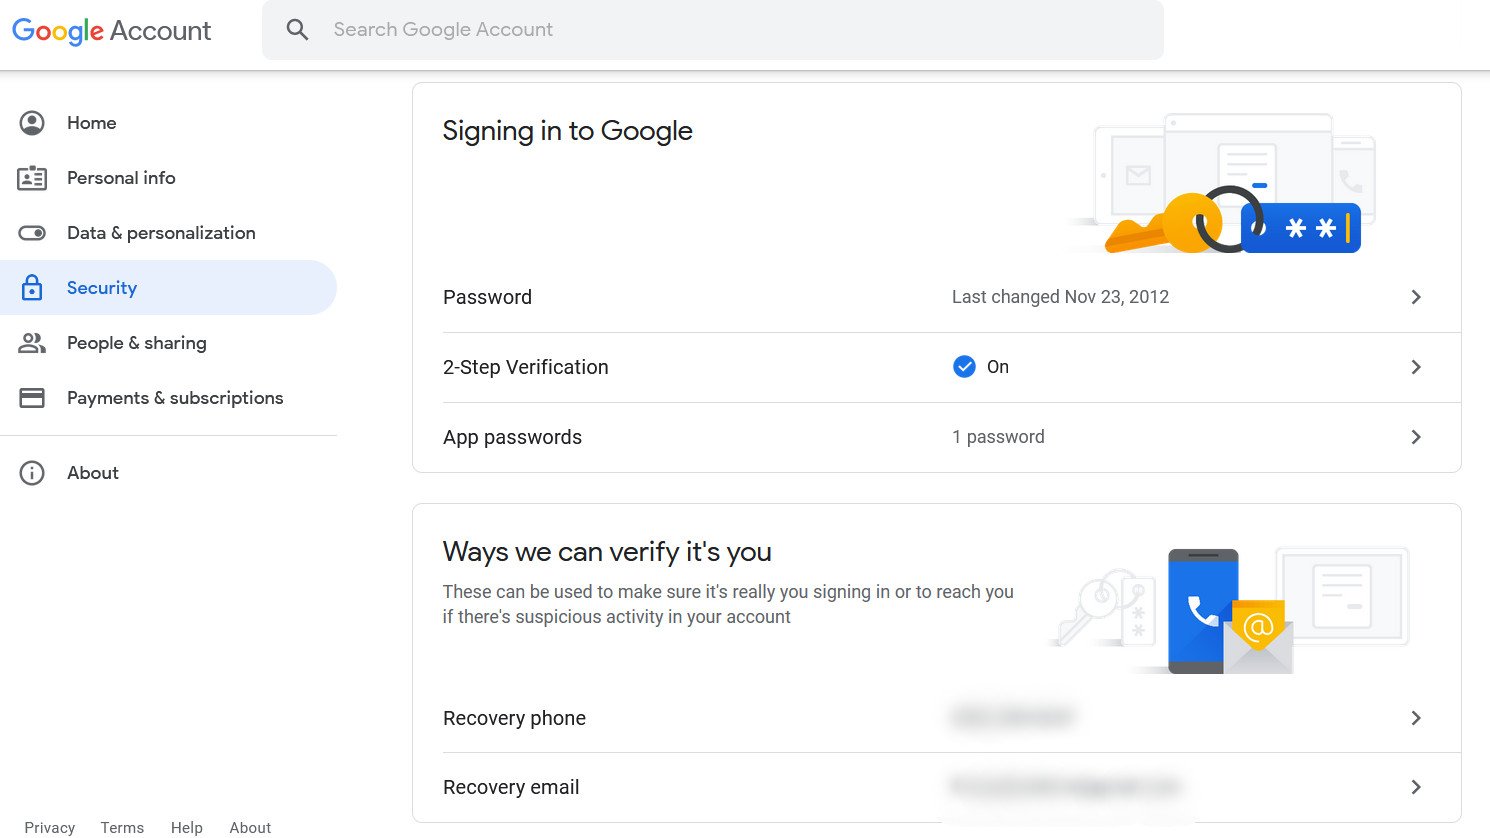
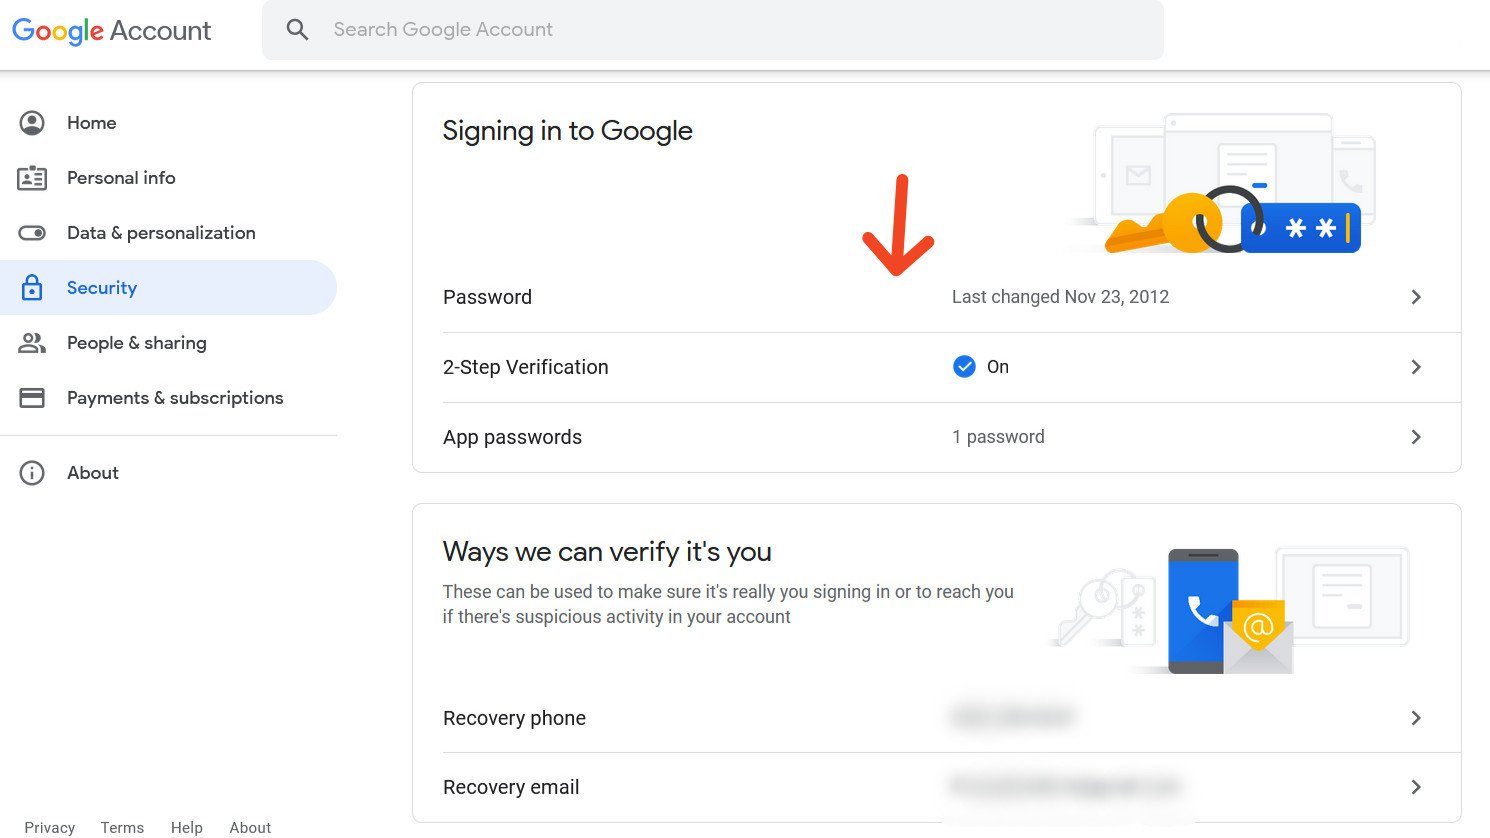
Click Password.
-
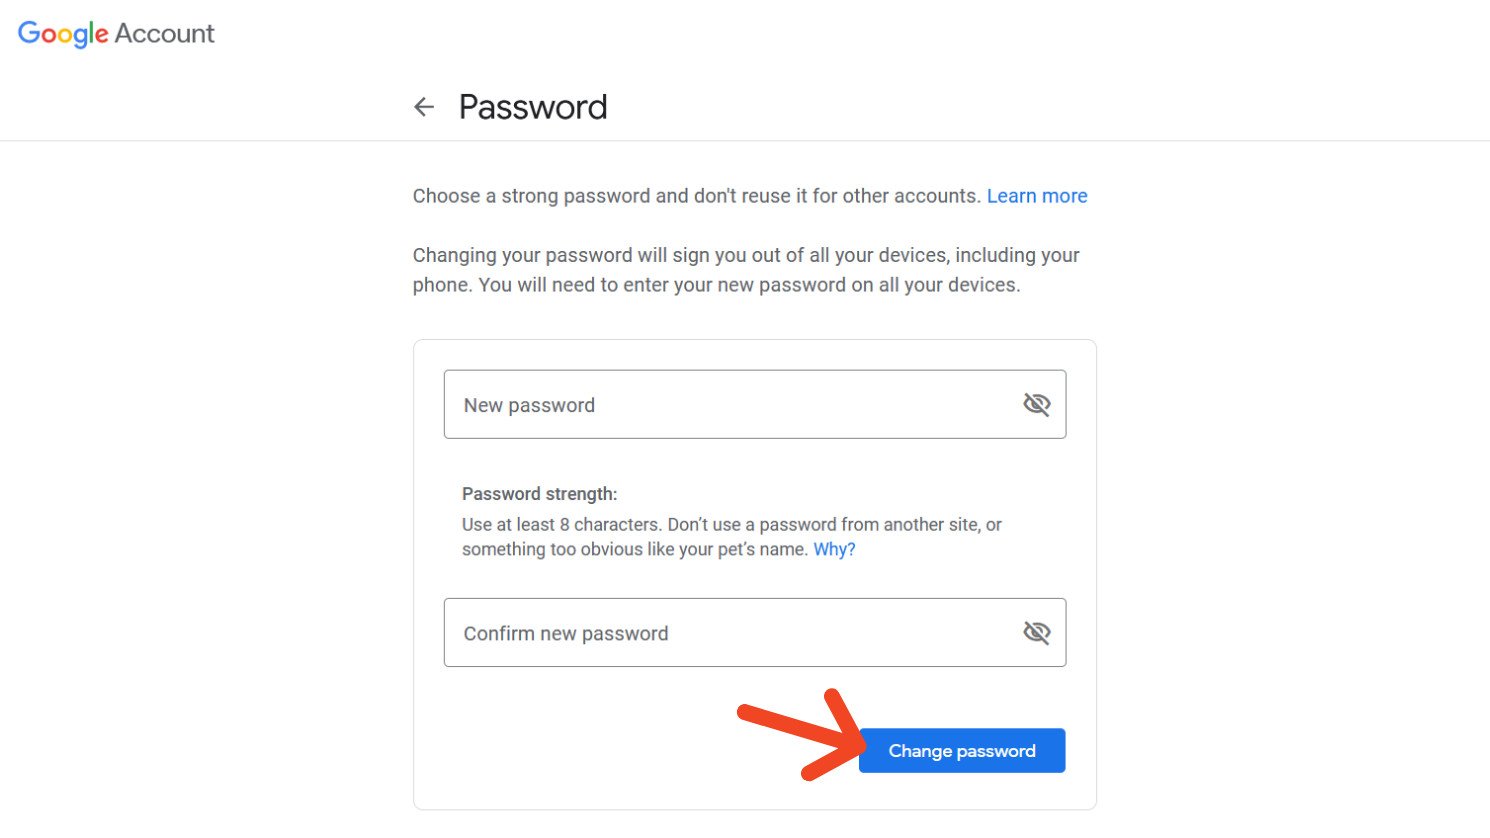
Choose a strong password and type it into both text fields.

-
Click Change Password.
- Your password has now been changed. If you have multiple distinct Google accounts, you will have to sign in and change each one individually following the same process.
A good way to ensure you have a unique password is by ensuring you meet Google’s password requirements. That means selecting 12 characters or more with a combination of letters, numbers, and symbols without accents. If you have trouble remembering your password, this is a good opportunity to chest out the best password managers for Android devices to keep it handy.
Set up 2-Step Verification
Now that you’ve changed your password, you should go ahead and set up 2-Step Verification.
This option prevents you (or others) from logging into your Google account without inputting a code received via text, phone, authenticator app, or an emergency recovery code.
Without this secondary code, you will be locked out of your account. This is useful in the event bad actors get their hands on your password and try to log in. This second confirmation acts like something of a failsafe to keep others out.
-
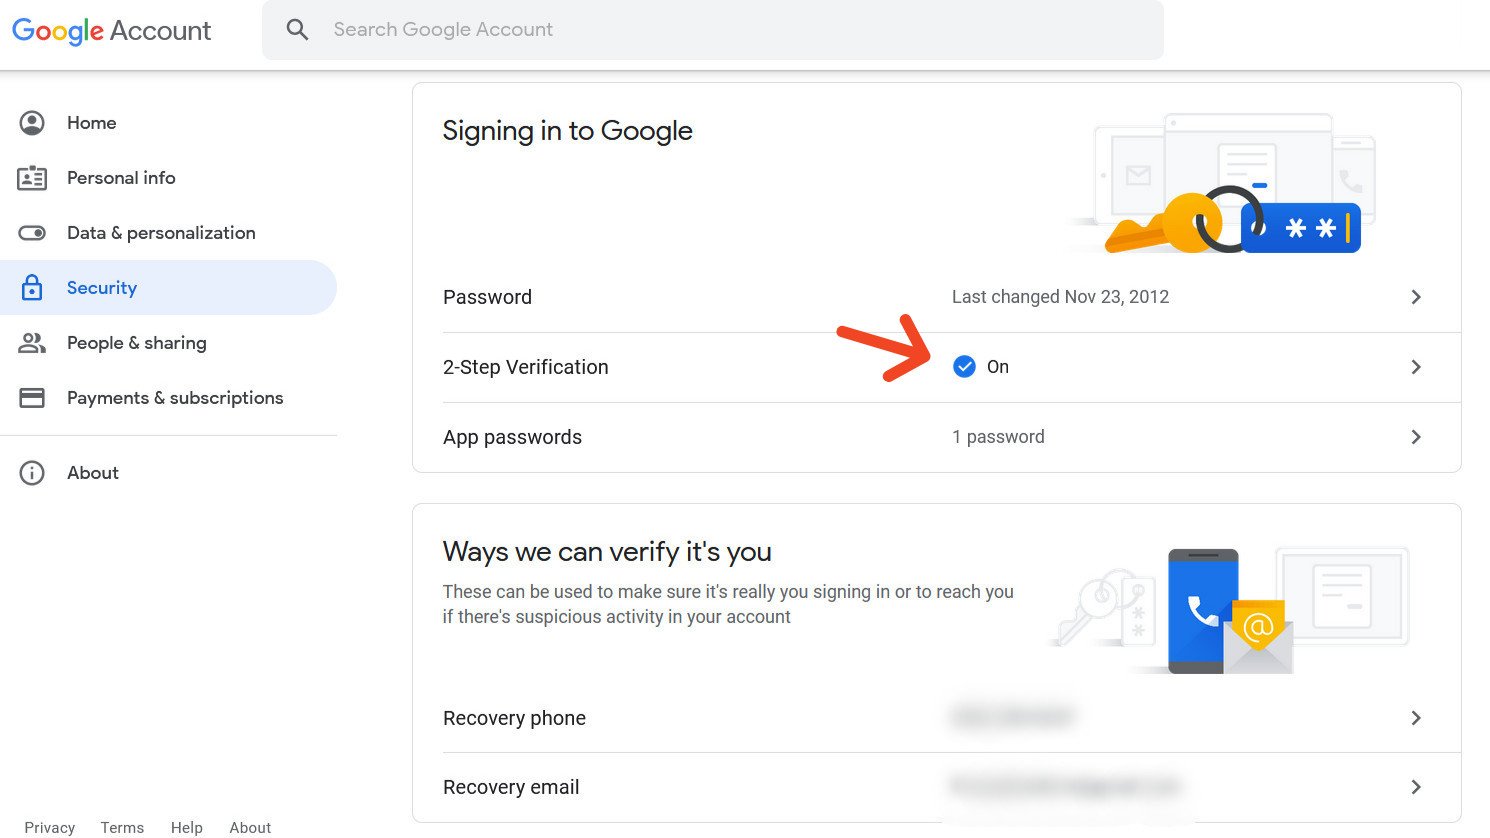
Go to the Google Account Security page.
-
Click on 2-Step Verification. If you already have it enabled, there will be a checkmark beside the word “On.” Otherwise, it will say “Off.”
-
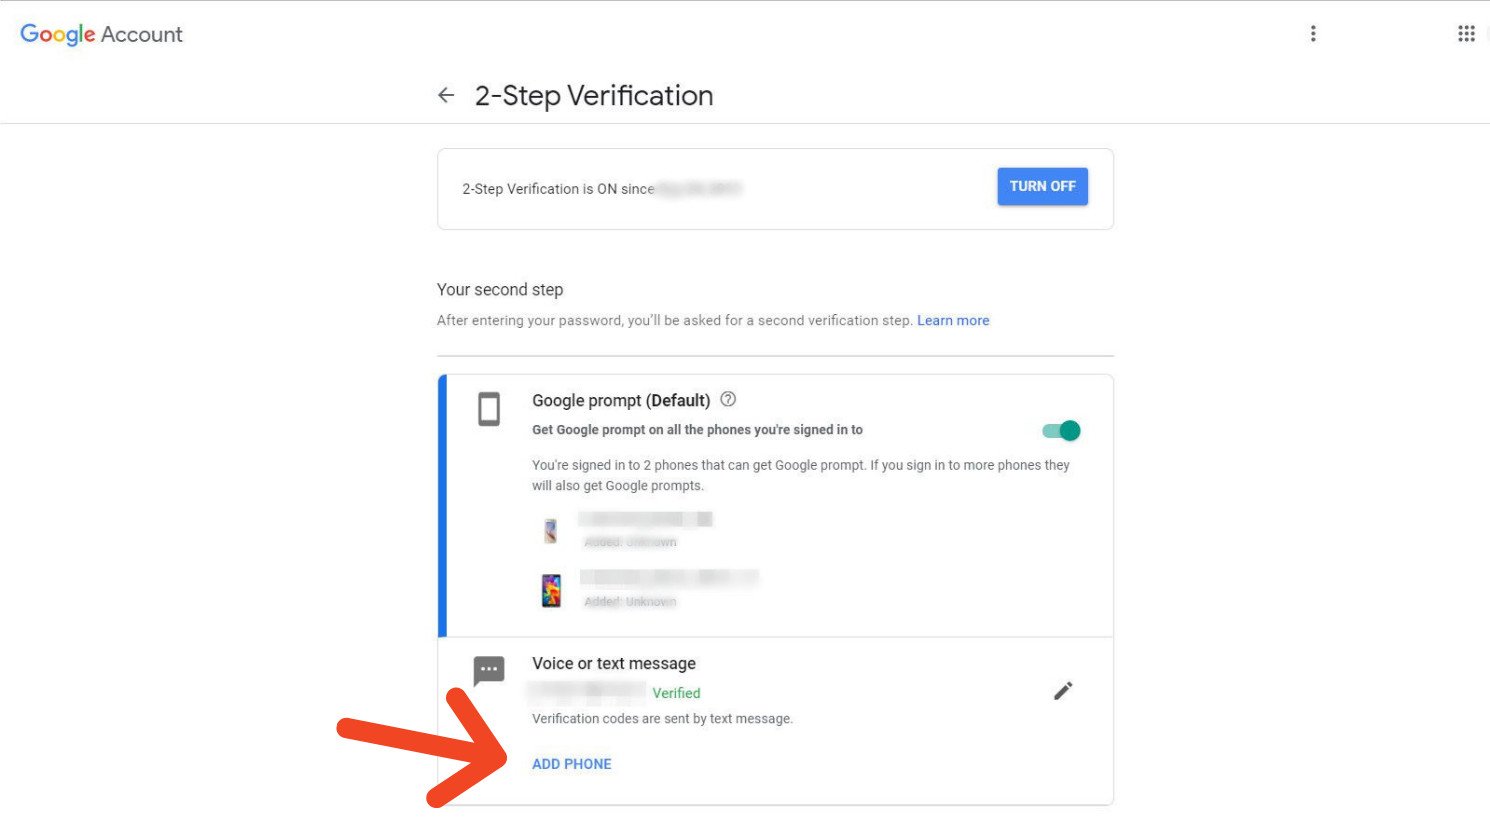
To enable 2-step verification you can add multiple phones via voice or text message. For now, look for the Voice or text message option and click Add Phone.
-
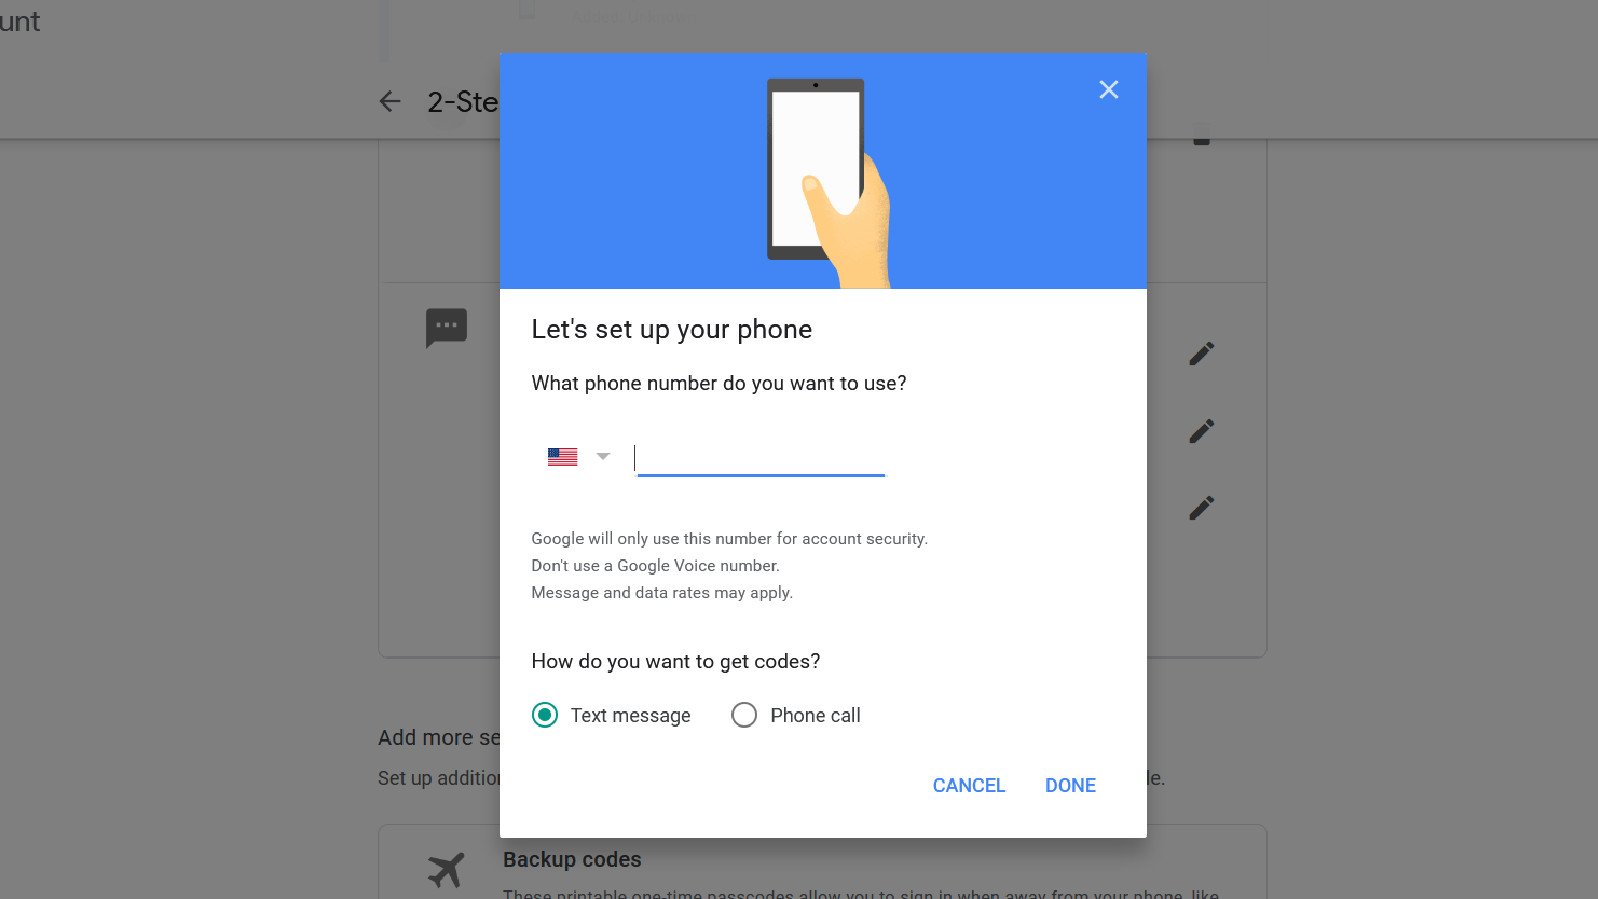
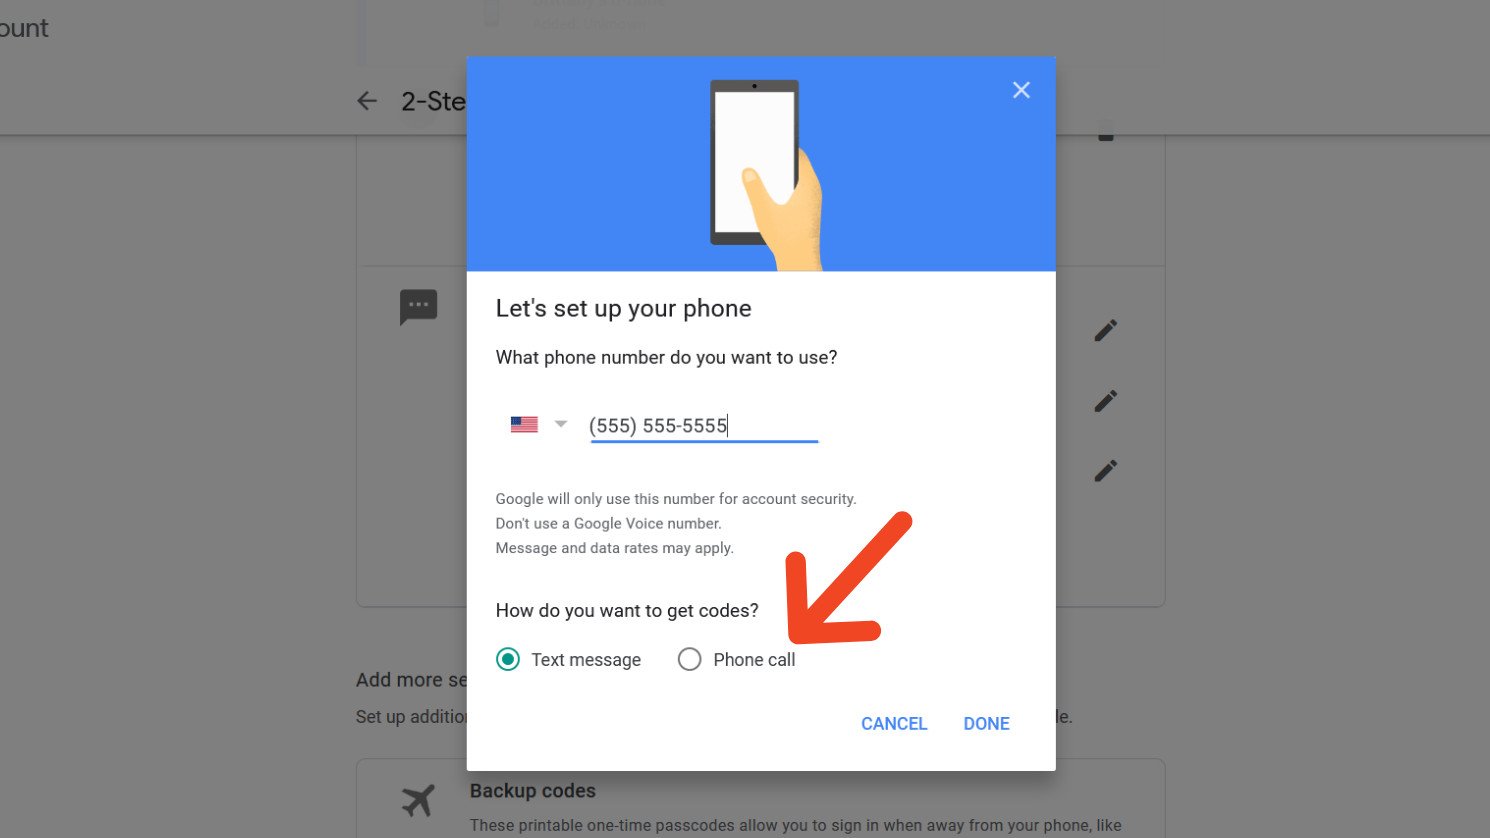
You’ll see a dialogue box appear that says “Let’s set up your phone.”
-
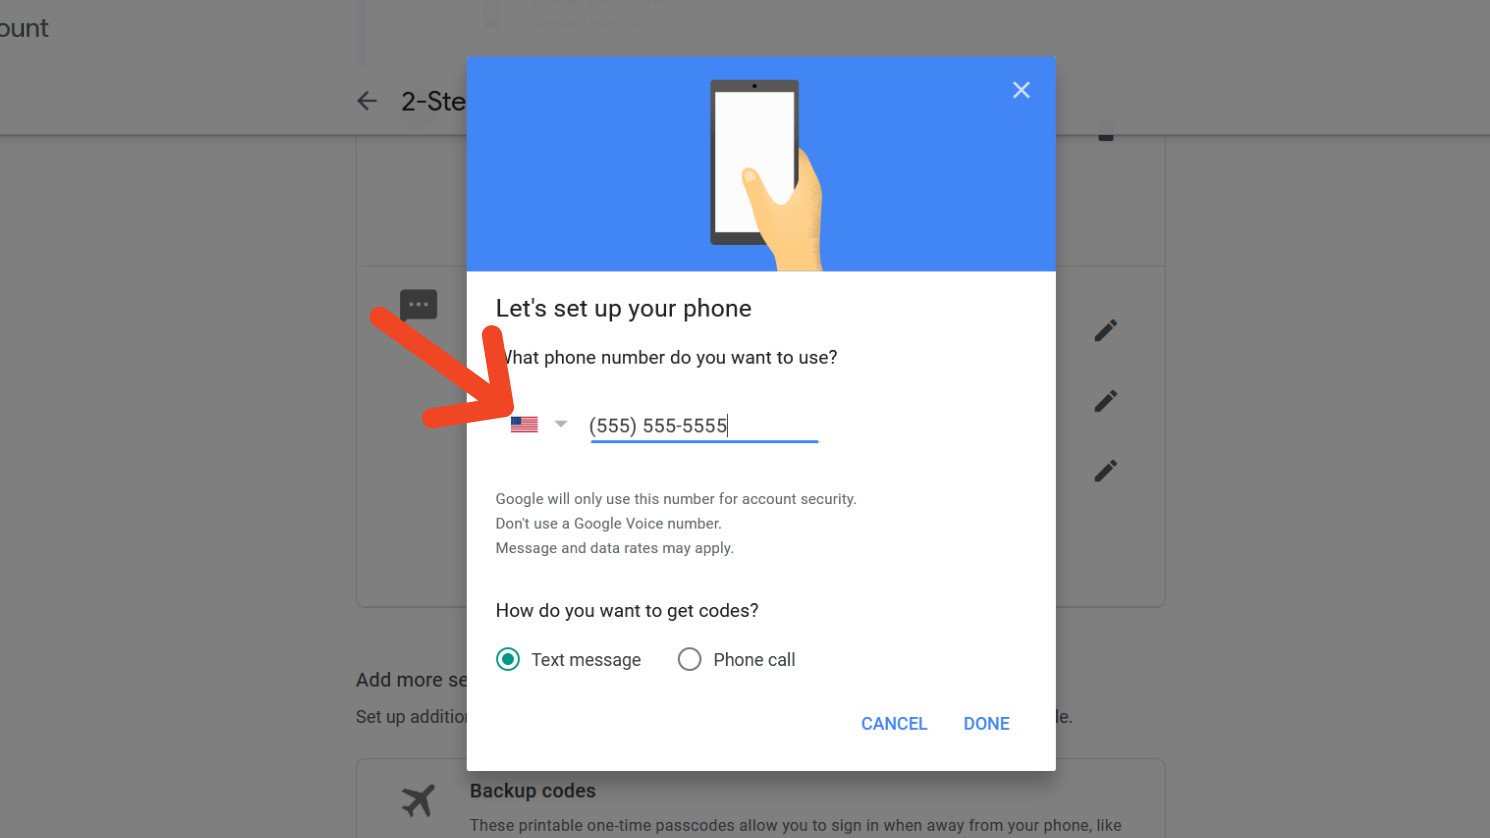
Type in your phone number with area code in the blank box.
-
Choose whether you want to receive your codes going forward via phone or text message.
-
Click Done.
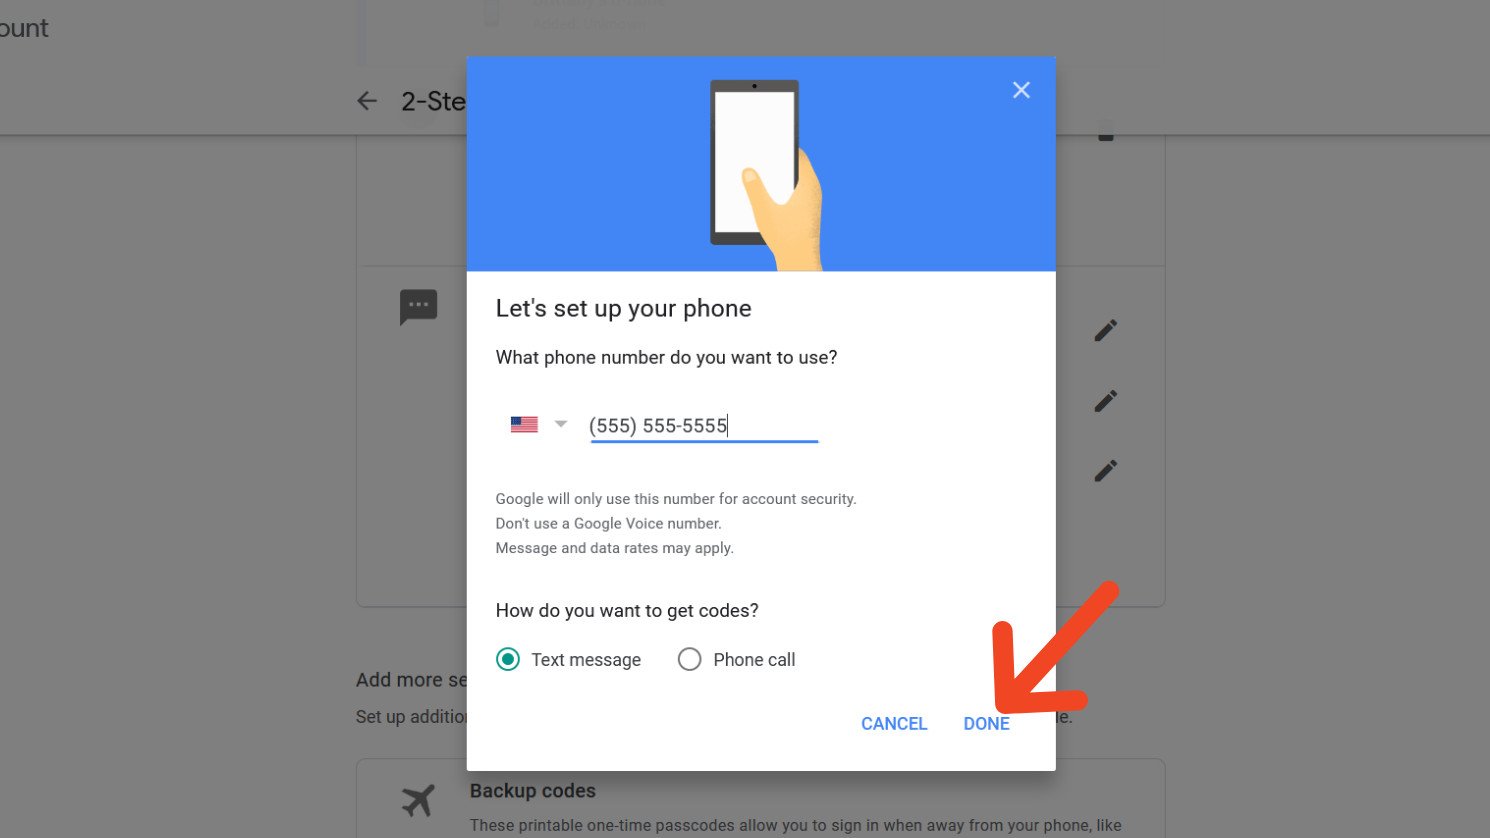
- Check your phone for an incoming phone call or text message, depending on your selection.
-
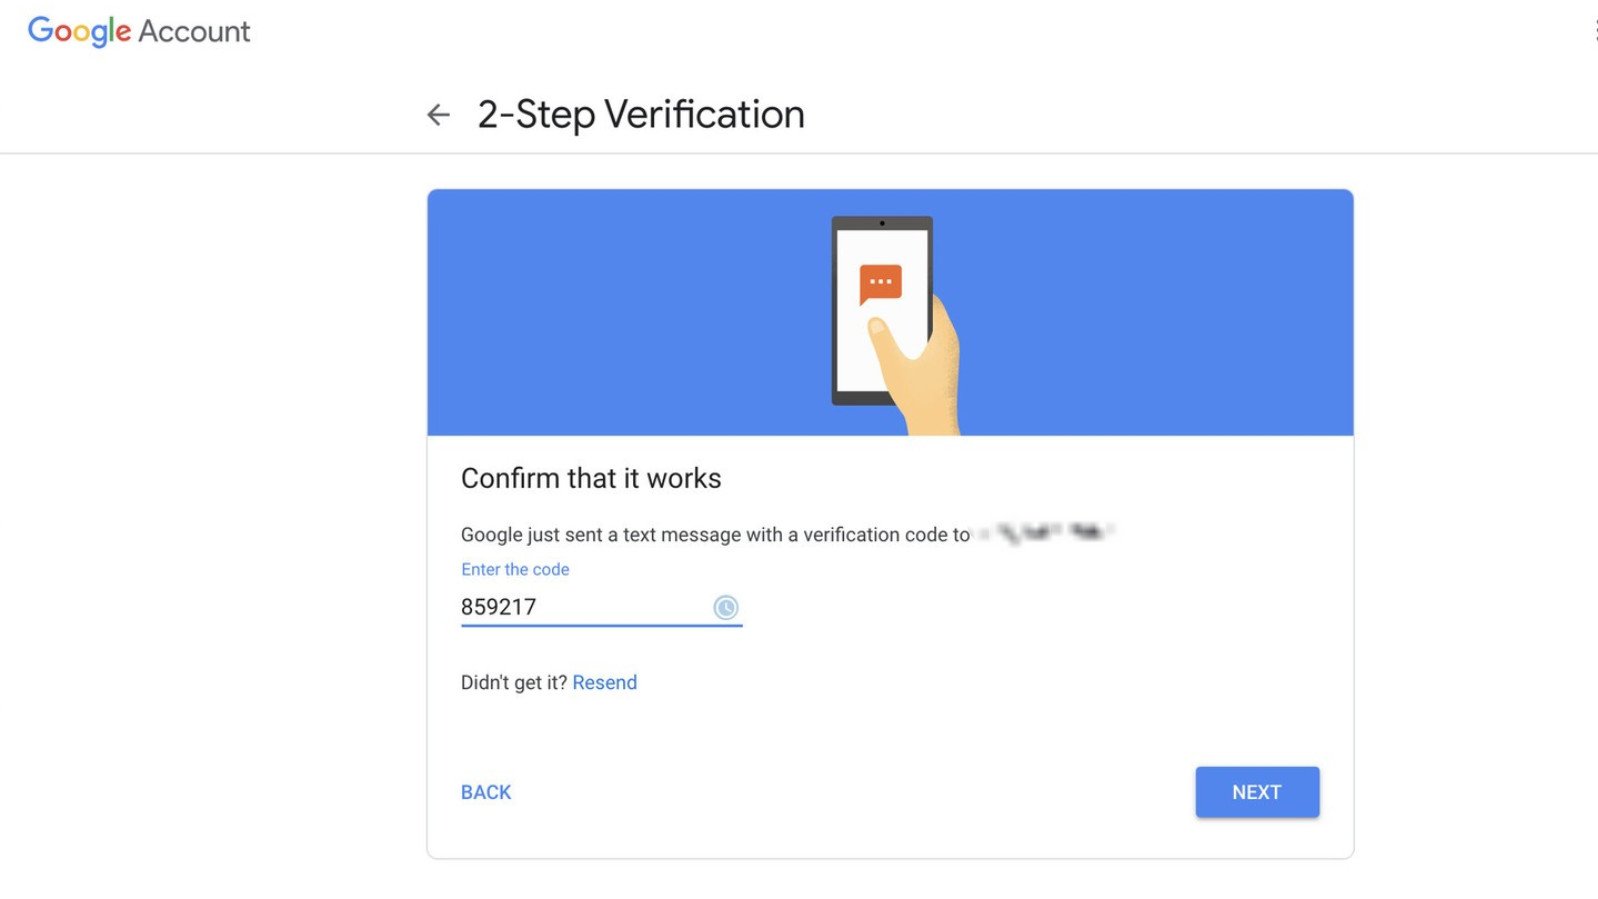
Write down the code you receive. You’ll need to do this every time you log into a new location.
-
Enter the code you received in the “Confirm that it works” field.
-
Click Next.
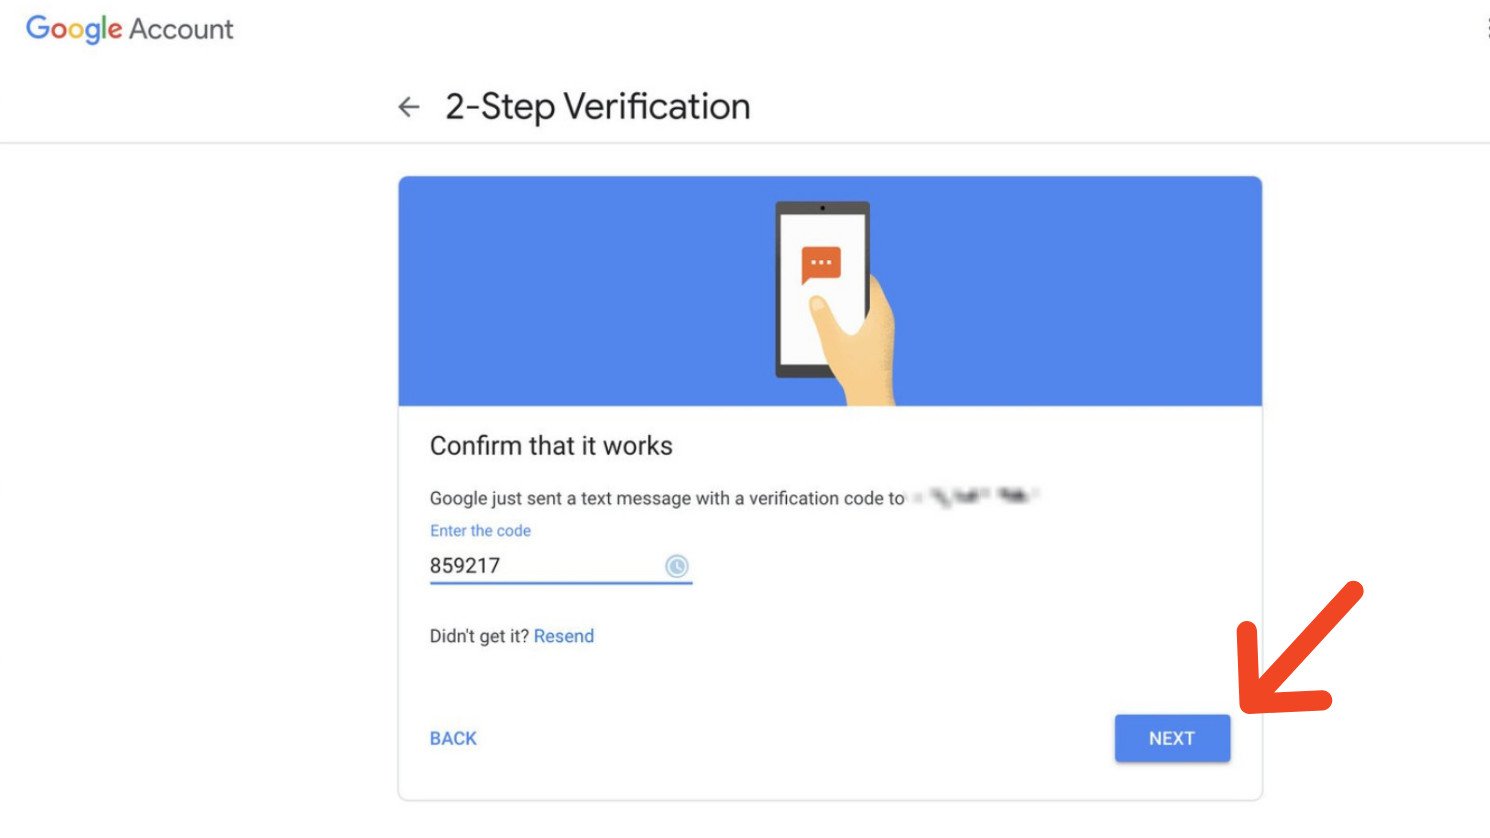
- Google will confirm you’ve completed setup via dialogue box. Click Done.
For additional 2-Step Verification options, be sure to view our complete tutorial on how to enable two-factor authentication on your Google account.
Set up a recovery email address
Once you’ve changed your password and have 2-Step Verification set up, you can add another layer of defense by choosing a recovery email address.
You can use this email address as a backup to log into your account if for some reason your main account is compromised or otherwise inaccessible. Google will also notify you here if it detects unusual activity on the account this email is linked to.
Here’s how to set it up.
-
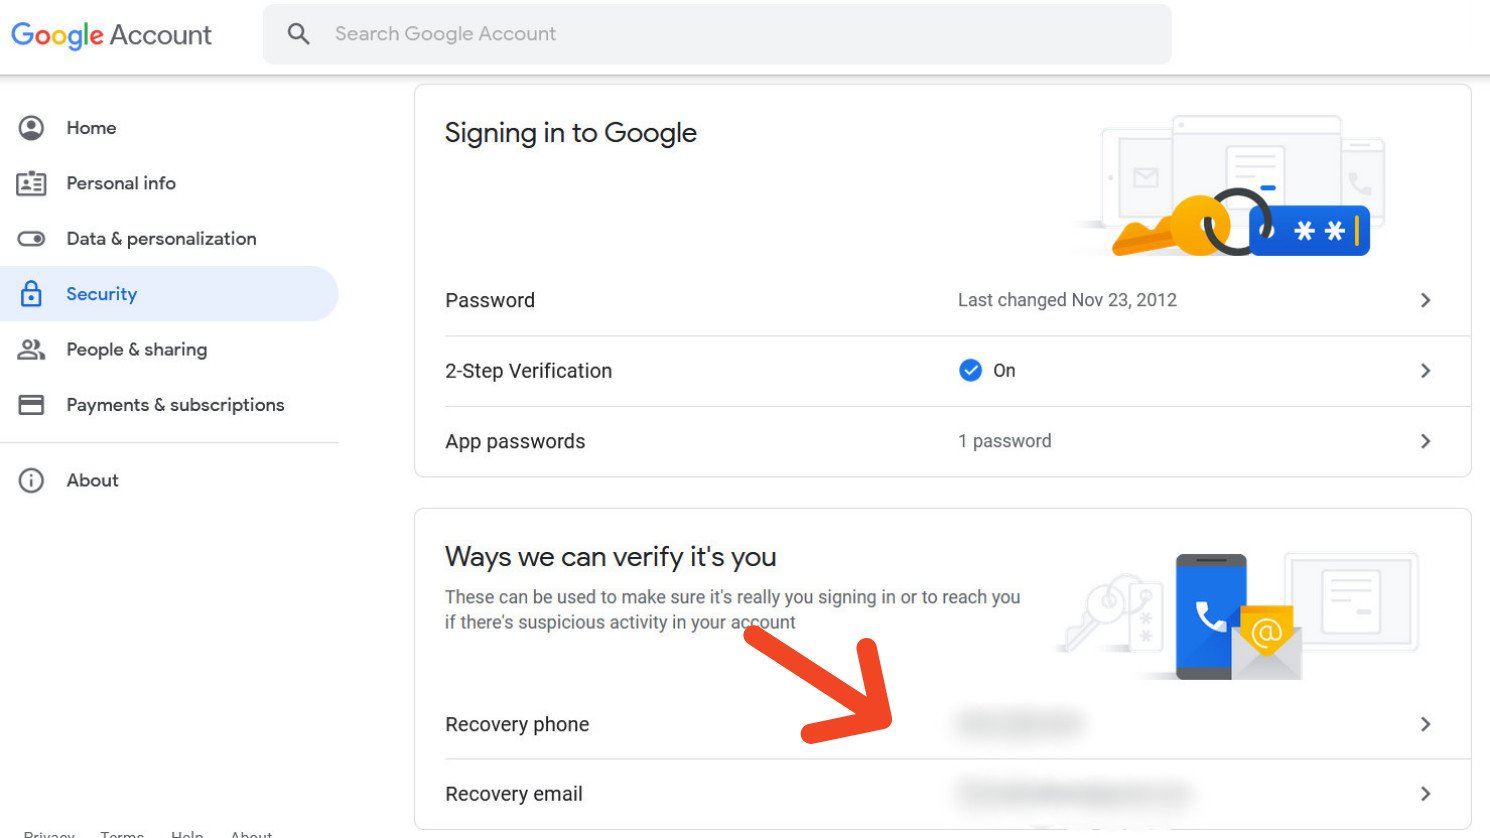
Go to the Google Account Security page.
-
Click Recovery Email.
-
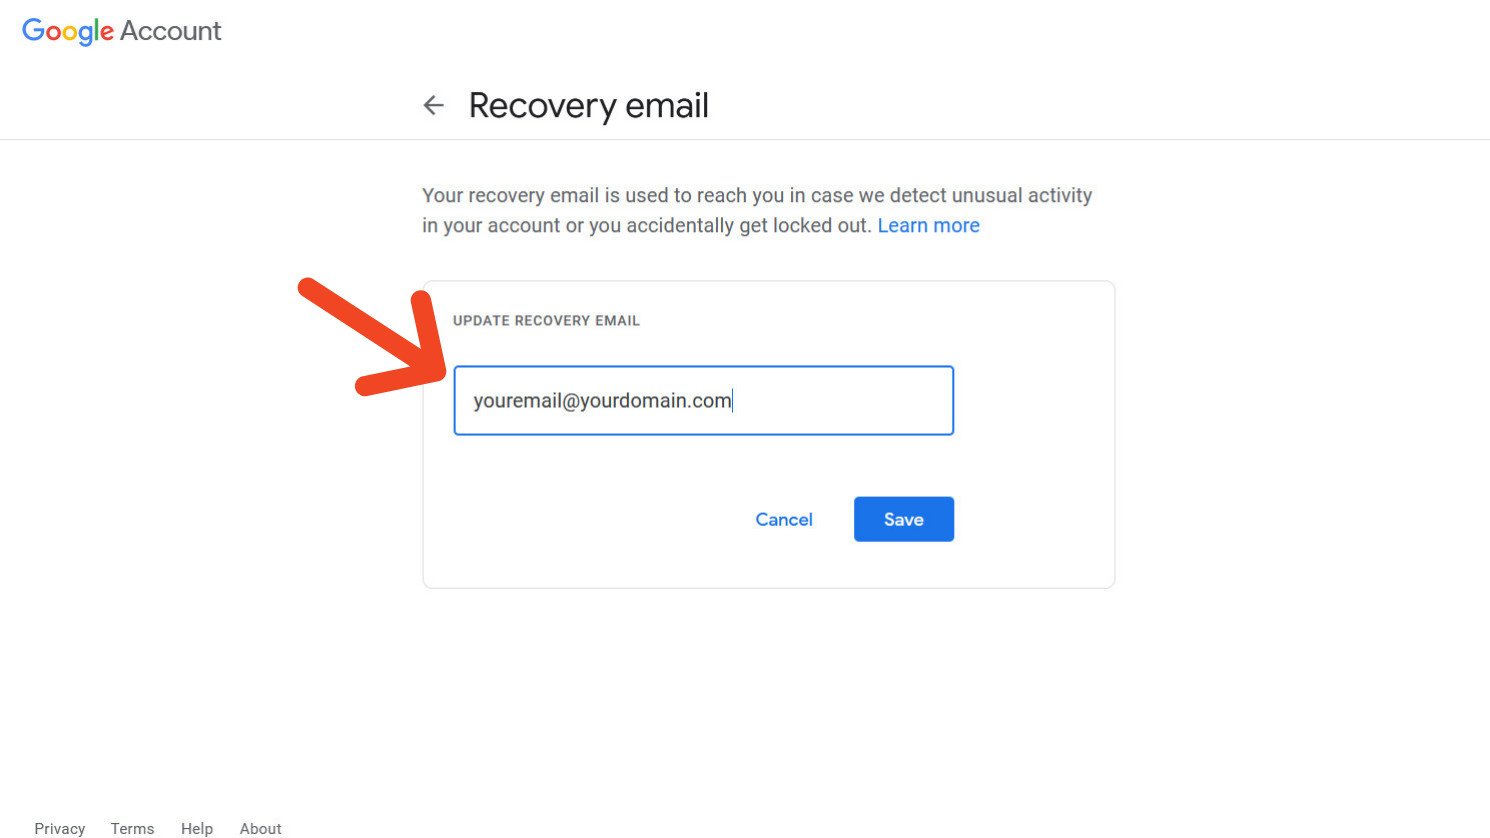
Type in your email in the Update Recovery Email box.
-
Click Save.

Taking these steps to secure your Google account should offer some peace of mind. You can rest easy knowing you’ve done all you can to protect your email and other sensitive data. Now make sure you keep up with it now and then to stay up to date.
![]()
www.itsec.hk
www.itsec.vip
www.itseceu.uk
Leave a Reply